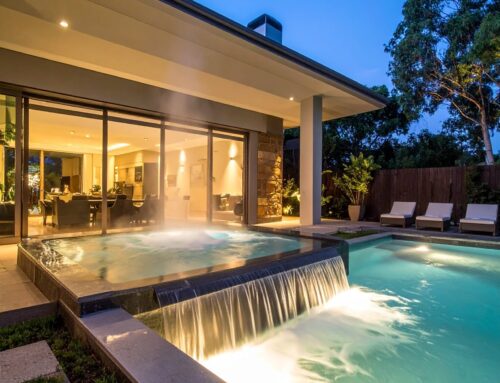
A green pool isn’t just an eyesore – it’s a health hazard and a sign that your water chemistry has completely collapsed. The moment you spot that telltale emerald tint, you’re dealing with an algae bloom that’s thriving in unbalanced water, and every day you wait makes the recovery process harder and more expensive.
Most Australian pool owners face this problem at least once, especially after returning from holidays, during the scorching summer months, or when equipment fails without warning. The good news? With the right approach, you can restore your pool from swamp-green to crystal-clear, though the process demands patience, proper chemicals, and often professional intervention depending on severity.
Understanding Why Pools Turn Green
Algae growth is the culprit behind every green pool, but understanding what allowed that algae to flourish helps prevent future outbreaks. Algae spores are constantly entering your pool through wind, rain, and swimmers, but they only multiply when conditions are perfect.
Three primary factors create the ideal environment for algae:
Low or depleted chlorine levels that fail to sanitise effectively
Poor water circulation from malfunctioning pumps or clogged filters
Imbalanced pH and alkalinity that reduce chlorine effectiveness
Intense summer heat accelerates algae growth dramatically. Water temperatures above 28°C create a breeding ground where algae can double its population in just hours, not days. That’s why pools can transform from slightly cloudy to completely green during a single hot weekend.
Phosphates and nitrates in your water act as fertiliser for algae. These compounds enter pools through fertiliser runoff, decomposing leaves, and even some tap water sources. Once algae establishes itself, it consumes these nutrients rapidly whilst producing more spores.
Assessing Your Pool’s Condition
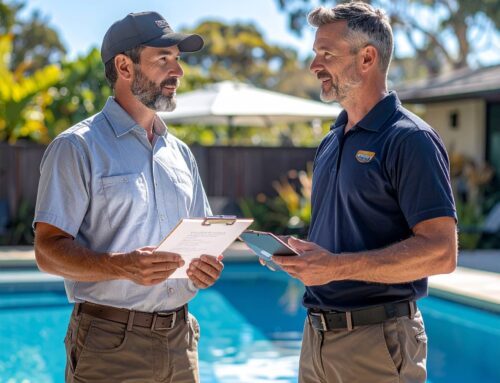
Before you start dumping chemicals into your pool, you need to accurately assess the severity of the problem. This determines whether you can tackle the job yourself or need professional help from Indigo Pool Care.
Light green pools still allow you to see the bottom clearly. The water has a greenish tint, but you can distinguish the pool floor, steps, and any objects below the surface. These pools typically respond well to DIY treatment if you’re committed to the process.
Dark green pools obscure the bottom completely. You can’t see more than 30-40cm below the surface, and the water resembles pea soup. This level requires aggressive treatment and multiple days of continuous effort.
Black-green pools represent complete algae saturation. The water is opaque, often with a black or brown tint beneath the green. These pools have usually been neglected for weeks or months and almost always require professional intervention to avoid wasting hundreds of dollars on ineffective chemical treatments.
Check your pool equipment immediately. Is the pump running properly? Does the filter show adequate pressure? A malfunctioning pump or clogged filter will sabotage any recovery attempt, no matter how many chemicals you add.
The Complete Recovery Process
Fixing a green pool requires a systematic approach. Skipping steps or rushing the process wastes money and extends your recovery time significantly.
Step 1: Clean All Visible Debris
Start by removing every leaf, twig, and piece of debris you can see. Use a leaf rake or skimmer net – don’t waste time trying to vacuum yet, as you’ll just clog your filter with algae.
Empty your skimmer baskets and pump basket completely. These need to be clear to handle the massive amount of dead algae you’re about to create. Check them multiple times throughout the treatment process.
Step 2: Brush Every Surface Thoroughly
This step is non-negotiable and often overlooked. Algae clings to pool surfaces with surprising tenacity, and chlorine can’t penetrate these colonies effectively without mechanical disruption.
Use a stiff-bristled pool brush and scrub every wall, step, corner, and the entire pool floor. Focus on shaded areas, behind ladders, and around fittings where algae establishes the strongest foothold. This physical action breaks up algae colonies and exposes them to the chemicals you’ll add next.
Plan to brush at least twice daily throughout the recovery process. Each brushing session releases more algae into the water where chlorine can destroy it.
Step 3: Test and Balance Your Water Chemistry
You can’t fix a green pool without knowing your starting point. Test your water for pH, total alkalinity, and stabiliser (cyanuric acid) levels before adding any treatment chemicals.
pH should sit between 7.2-7.6 for optimal chlorine effectiveness. If your pH is above 7.8, chlorine loses up to 50% of its sanitising power, making algae treatment nearly impossible. Use dry acid (sodium bisulfate) or hydrochloric acid to lower pH into the ideal range.
Total alkalinity should be 80-120 ppm to buffer pH and prevent wild swings. Adjust alkalinity before pH, as they’re interconnected. Low alkalinity causes pH to fluctuate constantly, whilst high alkalinity makes pH difficult to adjust.
Cyanuric acid (stabiliser) protects chlorine from UV degradation but can accumulate to problematic levels. Readings above 100 ppm cause “chlorine lock” where chlorine becomes ineffective regardless of how much you add. The only fix for excessive stabiliser is partially draining and refilling your pool.
Step 4: Shock Treatment
This is where you hit the algae with overwhelming force. Pool shocking means raising chlorine levels dramatically – far above normal swimming levels – to oxidise and kill algae rapidly.
For a light green pool, you’ll need to reach a chlorine level of at least 10-15 ppm. Dark green pools require 20-30 ppm, whilst black-green pools may need 40+ ppm. This typically means adding 2-4 times the normal shock dose, depending on your pool size and algae severity.
Use calcium hypochlorite (cal hypo) shock for the fastest, most powerful results. Liquid chlorine works but requires larger volumes. Dissolve the shock in a bucket of water before adding it around the pool perimeter – never dump powder directly into your pool, as it can bleach liners or damage surfaces.
Run your pump continuously during and after shocking. You need 24-48 hours of constant circulation to distribute chemicals and filter out dead algae. Turn off automatic pool cleaners during this phase, as they’ll just stir up debris and potentially clog.
Step 5: Add Algaecide
Once you’ve shocked the pool, add a quality algaecide to prevent any surviving algae spores from re-establishing. Use a non-foaming, quaternary ammonium algaecide for best results.
Don’t rely on algaecide alone to fix a green pool – it’s a support player, not the star. Chlorine does the heavy lifting, whilst algaecide mops up survivors and provides residual protection. Follow the product’s dosage instructions carefully, as overdosing some algaecides causes persistent foaming.
Step 6: Filter, Filter, Filter
Your pool filter now faces its toughest job – removing millions of dead algae cells from the water. This process takes days, not hours, and requires vigilant monitoring.
Cartridge filters need cleaning every 8-12 hours during recovery. Remove the cartridges and hose them thoroughly, paying attention to the pleats where algae accumulates. You may need to soak cartridges in filter cleaner if they’re heavily clogged.
Sand filters require backwashing every 24 hours or whenever pressure rises 8-10 PSI above the clean baseline. Backwash thoroughly until the sight glass runs clear, then rinse for 30 seconds before returning to filter mode.
DE (diatomaceous earth) filters need backwashing and fresh DE added after each cleaning cycle. These filters excel at removing fine algae particles but require more maintenance during recovery.
If your filter can’t keep up or your pool remains cloudy after 3-4 days, you may need professional equipment solutions or repair to ensure adequate filtration capacity.
Step 7: Vacuum to Waste
Once the water clears enough to see the bottom, vacuum all settled debris directly to waste – never through your filter. This prevents re-circulating dead algae and overloading your filtration system.
Set your multiport valve to “waste” position and vacuum slowly and methodically. You’ll lose water during this process, so have a hose ready to refill as needed. This step removes the bulk of dead algae that’s settled on the floor, dramatically speeding up final clearing.
Maintaining Clarity After Recovery
Getting your pool clear is one thing – keeping it clear requires ongoing commitment. After investing days and significant money into recovery, prevention becomes your priority.
Test your water chemistry at least twice weekly during summer, focusing on chlorine levels, pH, and alkalinity. These three parameters directly impact water quality and algae prevention. Free chlorine should remain between 1-3 ppm at all times, never dropping to zero.
Run your pool pump for adequate hours based on warm climate conditions. During summer, 8-10 hours daily is minimum for most residential pool care needs. Insufficient circulation creates dead zones where algae establishes unnoticed.
Clean your pool regularly – brush weekly, skim daily, and empty baskets frequently. Physical pool maintenance removes organic matter before it decomposes and feeds algae growth. A pool that looks clean on the surface can still harbour problems along walls and in corners.
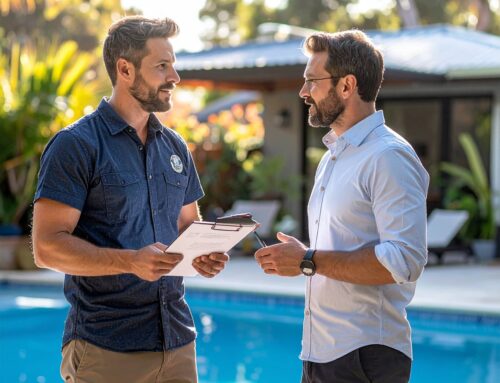
Consider a regular professional maintenance schedule, especially if you travel frequently, lack time for upkeep, or have experienced recurring green pool problems. Professional technicians catch small issues before they escalate into expensive emergencies.
When to Call Professionals
Some green pool situations exceed DIY capabilities, and recognising these scenarios saves you money and frustration. Attempting to fix certain problems yourself often makes them worse and more costly to resolve.
Black-green pools with zero visibility almost always require professional intervention. The chemical quantities needed, the specialised equipment required, and the expertise to diagnose underlying equipment failures make professional service the economical choice. What looks like a $200 chemical bill often becomes $500-800 when DIY attempts fail.
Recurring green pools signal deeper problems – equipment failure, structural issues, or water source contamination. If your pool turns green repeatedly despite proper treatment, you’re treating symptoms whilst ignoring the cause. Professional diagnostics identify root problems that DIY approaches miss.
Equipment malfunctions during recovery complicate everything. A pump that won’t prime, a filter with inadequate pressure, or a chlorinator that’s failed requires immediate professional attention. Continuing treatment with faulty equipment wastes chemicals and extends recovery time indefinitely.
Property managers and landlords face additional complications with green pools. Tenant disputes, liability concerns, and time pressures make professional service the logical choice. A green pool at a rental property isn’t just unsightly – it’s a potential legal liability and tenant satisfaction issue.
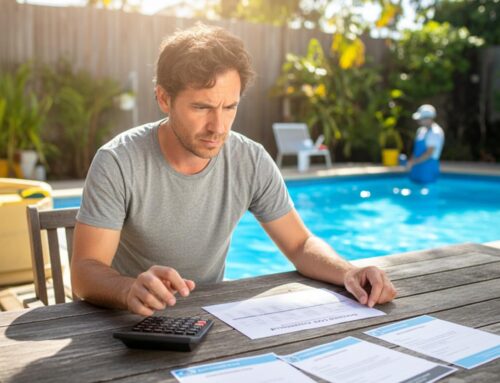
The Real Cost of Green Pool Recovery
Understanding the true cost helps you make informed decisions about DIY versus professional treatment. The financial investment varies dramatically based on pool size, algae severity, and your existing equipment condition.
A typical DIY recovery for a light green pool in a standard 50,000-litre pool costs $150-250 in chemicals:
Shock treatment: $60-100 (multiple bags of cal hypo)
Algaecide: $40-60 (quality quaternary ammonium product)
pH adjusters: $20-40 (acid to lower pH)
Test kit reagents: $15-30 (if you need to restock)
Dark green pools easily double these costs, whilst black-green pools can exceed $400-500 in chemicals alone. Add the value of your time – typically 15-20 hours spread over 4-7 days – and the real cost becomes substantial.
Professional service ranges from $300-600 depending on severity, but includes expertise, commercial-grade chemicals, and guaranteed results. For many Australian homeowners, especially those with demanding schedules, professional service represents better value than DIY attempts.
Hidden costs catch DIY enthusiasts off-guard. Clogged filters need replacement cartridges ($80-150). Pumps that burn out from continuous operation require repair or replacement ($400-1,200). Water that needs partial draining due to excessive stabiliser adds to your water bill. These unexpected expenses can transform an affordable DIY project into an expensive lesson.
Preventing Future Green Pool Problems
The best green pool fix is prevention. Once you’ve experienced the time, expense, and frustration of recovery, these preventive measures become obvious investments.
Consistent chlorination is your primary defence. Whether you use a salt chlorinator, liquid chlorine, or tablets, maintaining 1-3 ppm free chlorine at all times prevents algae establishment. Check levels twice weekly during summer, as heat and UV radiation deplete chlorine rapidly.
Adequate filtration and circulation keep water moving and remove the microscopic particles that feed algae. Run your pump long enough to turn over your entire pool volume at least once daily. For a 50,000-litre pool with a pump moving 300 litres per minute, that’s roughly 3 hours minimum – but 6-8 hours is ideal during summer.
Weekly brushing disrupts algae before it becomes visible. Spend 10 minutes brushing walls, steps, and corners every week. This simple mechanical action prevents colonies from establishing the foothold they need to bloom.
Regular professional pool maintenance catches problems early. Technicians servicing 500+ pools monthly recognise subtle signs that homeowners miss – slight cloudiness, unusual filter pressure, or chemical imbalances that precede algae blooms. A professional service schedule prevents most green pool emergencies entirely.
Proper equipment maintenance ensures your filtration system operates at peak efficiency. Clean cartridge filters monthly, backwash sand filters regularly, and service pumps annually. Equipment that’s struggling can’t maintain water quality, no matter how many chemicals you add.
Conclusion
Fixing a green pool demands systematic treatment, patience, and often significant chemical investment, but the process is straightforward when you follow proven methods. Start by assessing severity, remove debris, brush thoroughly, balance chemistry, shock aggressively, add algaecide, and run your filter continuously until water clears.
Most light to moderate green pools respond to DIY treatment within 4-7 days if you’re committed to the process and have functioning equipment. However, severe cases, recurring problems, or equipment failures warrant professional intervention to avoid wasting time and money on ineffective approaches.
Prevention remains far cheaper and easier than cure. Consistent chlorination, adequate circulation, regular brushing, and professional maintenance prevent the conditions that allow algae to flourish. Australian climate conditions create perfect algae environments during summer, making vigilant pool care essential rather than optional.
If you’re facing a green pool that’s beyond your capabilities, experiencing recurring algae problems, or simply want the confidence that comes with professional service, contact us for a comprehensive assessment. With over 12 years servicing 500+ Australian pools monthly, we’ve seen and successfully treated every green pool scenario imaginable – and we guarantee our results.